Carp ace Dave Lane shows how you can improve your bite indication when fishing for big carp – and catch more fish…
Rig Rejected!
THESE days our rigs – or more to the point our hook baits – are being tested and successfully rejected more and more by the carp we fish for.
On some of the larger waters I’ve fished where you can use boats, I’ve gone out on the water after 24 hours fishing to check the positioning of my rig. On numerous occasions I have found that my hook bait has been moved many yards by carp – with me receiving no indication on the buzzers at all!
Such occurrences have become almost commonplace. I don’t know if this is a new phenomenon or not. It could be one that has come about because of an increased learning curve by carp, a curve brought about by angling pressure and the carp’s danger association process.
Personally I think it’s been going on all the time and we have just been blissfully unaware of it. I think that carp are very adept at picking up our hook baits and ejecting our rigs without us even knowing about it. Put basically, our quarry is ‘getting away with it’ on a daily basis.
Obviously there must be the odd slip-up on the carp’s behalf or we would never catch anything, but I think most people would be horrified if they realised the inadequacy of our rigs and indication systems.
On my recent sessions at Linch Hill, which you’ll probably have been reading about in my ‘Lane’s Way’ diary feature, I have seen this taken to new heights where pricked fish are actually unhooking themselves without giving an indication at all!
Rig Choice
The harder a rig is to eject, then the more chance you have of a fish pricking itself to such a degree that the only course of action left available to the carp is to bolt from the area. In doing so it will try to shed the hook or head for a ‘safe area’, like snags or weed. This is when a run occurs. The question is, how long has that fish been trying to rid itself of the hook before you get your run?
I have watched fish at close quarters that have pricked themselves on a rig and then undertaken the most complex and bizarre ‘dance’ in an effort to unhook themselves. These fish have shown no signs of panicking and definitely give no indication of a bite.
No matter how good your rig may be, without a decent method of indication you will, unfortunately, know nothing about a pick-up until the fish panics and bolts off.
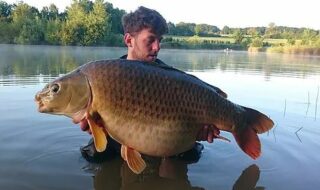
 |
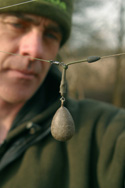
| Dave’s biggest fish – including this fifty – came as a result of using slack lines rather than tight lines |
If this is taken to its extreme, a smart carp in a pressured environment could take as long as it liked to remove the obstacle from its mouth before the angler even knew that it had taken the hook bait. Let’s face it, all of the tests that we perform on rigs – like dragging them over our thumb or finger – the hook seldom, if ever, penetrates past the barb.
This means that with a careful and delicate manoeuvre the hook can simply be lifted out of the carp’s mouth.
Carp Fingers
Think of a carp’s mouth. How deft will a fish be at small and localised contortions of the muscles in its mouth? Answer – extremely. After all, a carp uses its mouth as we might use our fingers.
Everything that a carp picks up and examines is done so with the mouth! Is this why certain known fish seldom if ever get caught? Maybe they take hook baits as often as every other carp in the lake, but they have a different way of dealing with the problem. They are more adept than other fish at ejecting rigs.
And why do some carp get caught more often than others? Carp with mouth damage for instance are more likely to get caught because their mouths are less able to deal with getting rid of a pricked hook.
Unfortunately, the more that you think about it then the more obvious and scary it becomes. Anybody who spends any significant amount of time stalking will have countless stories of fish simply ‘spitting out’ their rigs. This happens just as easily when fishing at range.
In fact, the problem is probably exacerbated when distance fishing due to the reduction in how sensitive your bite indication is. Carp at distance have more ‘time’ to deal with the rig before your indicator moves.
I don’t profess for one moment that better registration of a bite will always help you hook a rig-wary carp, but it will at least let you know that your rig has been tested and that there is a very real possibility that all your free baits have been robbed.
It will also alert you to the fact that you may just have already hooked one that is doing its very best to eject the rig as you sit there staring at the rods, waiting for one to ‘rip off’. A point well worth knowing about I think!
Different Indicators
A glance through the adverts in any magazine will reveal countless different types of indicator. You have hangers, springers, stingers, and drop-back bringers or whatever they are all called nowadays.
Without a shadow of a doubt they will all perform a given task extremely well and some will perform better in different circumstances than others. The problem does not, as far as I see it, lay in the choice of equipment but more in the way that we deploy it.
There is one common denominator that is simply taken for granted. When we fish close in, we opt to use many different approaches and methods of indication. We use slack lines and back leads. We freeline baits, use tight lines and so on. Generally, we pick the method most suitable on the day.
The standard long-range approach when fishing distances of over 40 yards or so, seems to be high rod tips – indicators tight under the rods, coupled with a large fixed lead and a line tight enough to ride a bike along!
Tight Lines
The thinking behind it all is very clear. It’s thought that a tight line set-up with high rod tips will indicate a bite quickly, stopping the fish gaining any momentum. The big fixed lead will drive the hook home and provide enough resistance to fish a tight line in the first place.
This is mostly rubbish! Bite registration can be increased dramatically just by thinking a bit about how you are fishing.
A few years ago I put a lot of thought into fishing with tight lines. Tight lines were starting to become more widely used on the big pits I fished. In fact, ‘solid’ set-ups had become a bit of a cult approach.
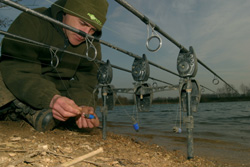
 |
| Clipping up with a tight line |
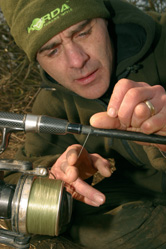 |
| ….does not help bite indication |
I ran a whole set of tests on various set-ups and the results told an entirely different story to what people were assuming was happening on their tight line indication set-ups.
The more tests that I did the more obvious the problem became. The reasons for it also became clear. Most anglers use monofilament line, which has a high degree of stretch. When you stretch a line tight you can only remove a certain amount of that stretch. If you remove it all, you will drag the lead back towards you.
The Stretch Factor
This means that when a fish picks up your rig it has to remove all the remaining stretch and then engage your Baitrunner or clutch before you can possibly get any indication on a tight line set-up. Watching the rod tips can help, but you cannot do this when you are asleep! This in turn means that the amount of distance a fish can swim before you get a registration is considerable.
However, if the same set-up is used but the line is paid out until it is no longer taught (not slack, just unstretched), then the fish would give an instant indication on your alarm.
If it is possible, you should try to fish with a slight drop on the bobbin or even just a tiny sagging of the line. The sagging must be taken up by the fish before it can even start to stretch the line.
No bobbins are heavy enough to stretch a monoline, so a bite – or early registration of a bite – will always be had. I know that weather conditions will often make it impossible to fish any ‘drop’ on the bobbin, as the undertow of the water will always pull on the line, but just having no stretch in your line will, in itself, give much quicker bite registration. The addition of a ‘back lead’ placed directly below the rod tip will help to combat ‘line tow’ and drifting and a slack line can still be used.
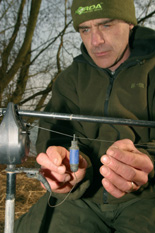
 |
| Back leads, funnily enough, can help bite indication in windy conditions when there is a lot of undertow. |
Tight Line Test
The tests I used when measuring the effects of tight lines are easy to create and I recommend that you give them a try. It is very hard to convey in words how much of an effect you will discover by trying this simple test.
Take your normal set-up to a nearby field, or just try it along the bank when you are fishing (you need about 100 yards of open ground). Set the rod up on the rests as if you were fishing and walk the lead to a spot 70 yards away.
It is best if you leave a rig on. Leave it on the ground 70 yards from the rod, then, back at the rod, tighten everything up and set the bobbin. Set everything exactly as if you were fishing with a tight line. In fact, make the line as tight as possible!
Turn the volume of the alarm to high. Walk back to the rig and slowly move it. Measure the amount of line that you can take by picking up the rig and moving it as if you were a fish. You will find that, with a tight line, bite indication is very poor and you can move your rig quite a way before the buzzer sounds. The tight line set-up gives an indication that bears little or no resemblance to the amount that the lead is moved at all!
It is frightening how far the lead can be moved before a bite is registered. Sometimes four or five metres of movement may only register one single bleep on your alarm.
Also move the rig from side to side, and towards the rod. You will still find that indication is poor.
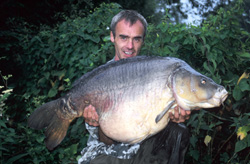
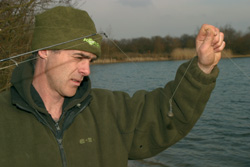
 |
| Dave has caught plenty of carp as a result of fishing with slack lines, which improve bite indication |
Slack Line Test
Then repeat the whole process. This time set up your rod with an unstretched (slack) line, and incorporate a short drop on the bobbin. The difference is obvious. Indication sensitivity will be increased instantly.
If you repeat both tests with a free-running lead rather than a fixed lead, you will get totally different results once again. You’ll find that indication is increased with a running lead.
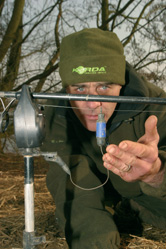
(pic 5)
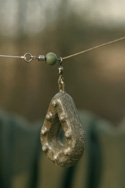
The type of lead that you use can create an even better bite indication scenario. Normal, pear-shaped leads tend to roll quite easily along the lake bed. However, a flat or ‘grip’ type lead will stay in position on the bottom.
I tend to favour the new Korda Gripper leads, as they have extra grip in the many nodules set into their surface. A large Gripper of four or five ounces will give the perfect pivot for a running line and allow full transmission of a bite to your alarm system.
If you run this simple set of tests, I can absolutely guarantee to you, beyond any doubt, that the results you experience will change your entire thinking behind bite indication forever!
Snag Fishing
Imagine a different scenario – one where you are fishing tight up against a snaggy island margin. You would normally fish with the line pulled back so tight that it sings in the breeze. Your entire set-up would be locked-up, so the fish could not gain any line at all to get in the snags. At least, that is what you might think.
In tests I moved a fixed lead set-up on a tight line, at 60 yards range, almost two yards with only one single bleep being registered on the alarm. If you were snag fishing the battle would be already lost because the fish would have reached the snags.
If it had kited left or right, then the distance of travel before a single bleep is registered could be trebled. One winter I fished on a lake where the fish spent two months holed up under a snag bush on the back of an island.
The channel from bank to island was only about 10 yards, but the snag was severe and fish were regularly lost to lightening-fast takes that dragged you into the snag before you could even reach the rod.
I decided to test the slack line theory in this snaggy situation and see what happened. I set up a chair right next to the single rod I was using. I fished the tip high and had the limp line hanging down towards the baited rig that was on the extreme edge of the bush.
I hoped that, as soon as the fish picked up the bait, the bow in the line would start to tighten and the tip would knock. I would then strike and pull the fish clear of the branches before he even realised what was happening.
Indication Test
|
|
No Fish Lost
Due to the tests I had done on the bank, I knew that I was striking at the very first registration of a bite, long before the fish had panicked and bolted into the branches.
It was a tactic that landed me a few fish that otherwise may have been lost, but you must sit by your rods and stay alert watching the line. Don’t go to sleep fishing like this!
Fishing over distance at snags in this way does bring a problem of its own. The stretch in the line that the fish can pull once you have hooked it can be enough to reach the very snags that you are trying to avoid.
In this situation I tend to hit the fish and run backwards like a madman until full contact is made. Then you have the added advantage that you are on him before he has started to bolt. At short range, however, it can work to your advantage as the stretch can help absorb that first lunge as you hold the fish on a tight clutch.
As in all snaggy conditions there is a safety issue here with the type of rigs that you choose. The fish must be able to lose the lead should a breakage occur.
I find that a good test of a safe rig is to hold your hook (carefully) in one hand with the lead hanging. Jolt the lead with a small flick of the wrist. If the lead does not come free or travel back up the line, then the rig is not considered safe!
Conclusion
I hope that you find some use from all this information and that it helps you put a few more fish on the bank. Whatever the outcome I am certain that it will make you think about what might be happening out there on the lake bed, compared to what is happening on your bite indicators.
![]()