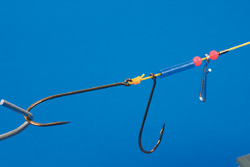
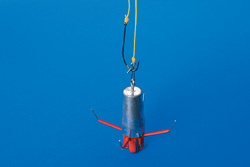
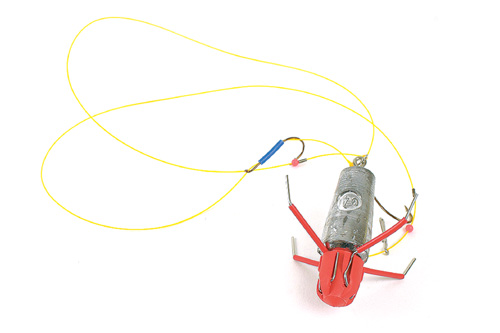
How to build a simple, straight-through pulley rig…
We fish over rough ground because we know that it does, or is likely to, hold fish. If the ground you are fishing requires a long chuck then this rig is the one you need to use.
It’s streamlined enough to allow you to hit the mark, is built from tough components to combat the rough terrain and, best of all, it’s simple so there is less chance of snagging.
This rig has evolved through generations of fishing over rough ground and it’s a proven fish catcher. If you prefer, you can add rotten bottom weak links into the equation but I don’t tend to use them unless I know I’m in with a real chance of losing gear, or if I’m fishing at medium range.
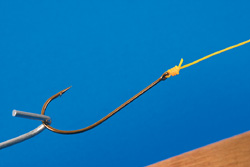
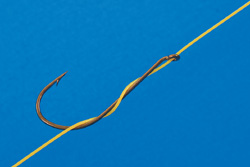
As we’re now into the cod season, this is the ideal rig. You can use the hooks of your choice but we’ve gone for a size 2/0 and 3/0 Pennell set-up. If you’re using bigger baits, go up to a size 4/0 and 5/0 Pennell.
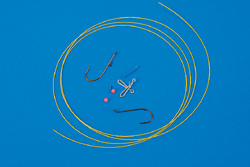
Shopping List
For this rig you will need:
1 x Genie Link Clip
1 x Genie Rig Clip
2 x 4mm beads
2 x crimps
1 x Size 2/0 hook
1 x Size 3/0 hook
1600mm of 60lb mono
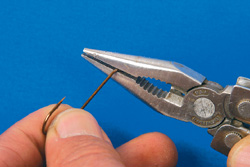
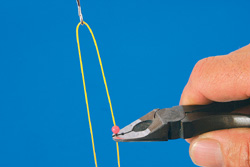
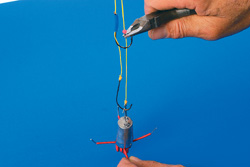
A pair of pliers
Top Tip
If you want to get rid of the twists that have been introduced to a rig while tying it, simply attach the lead and hang it up on a peg overnight.

.jpg)