Jim O’Donnell, skipper of top Plymouth charter boat ‘Tiberon’, explains what a boat angler needs from an effective chart plotter and how they can catch him more fish.
WELCOME to the 21st century an age where computers drive trains and order milk automatically when the fridge runs low, an age where if you don’t keep up, life will quickly pass you by, and fishing is no exception.
With some excellent equipment available like, coloured chart plotters, we have now entered the world of the cyber pollack.
Through four articles on this site I hope to open your eyes to a world that from the outside can look quite complicated and easy to avoid by saying ‘I don’t need that to catch fish’, but is actually quite a simple world. With most chart plotters offering similar features, once you know one, you’ve conquered the game.
To my mind it’s a kind of man over machine thing, where the machine can drive you or you can drive the machine.
Some of you might say ‘it’s alright for you, you’re young and work with this equipment on a daily basis’. But trust me, I was the last to catch on. Up until two years ago I avoided any item that resembled a computer like the plague until one morning I woke up early to find a lap top sat in the middle of my living room table where I sit and have my morning coffee.
This annoyed me, I have to admit. It was like being confronted by my enemy and both of us were ready to do battle.
I circled the table looking, whilst the dog sat and growled at the peculiar item which was intruding on our morning coffee time. “That’s it!” I said. “I’m going to master this if it kills me,” and within 24 hours I was up and running on the internet surfing away, answering emails and doing most of my business on the thing I had once feared the most. I am sure that there are quite a few of you that fear chart plotters in this way but trust me, get over your fears, buy one, tame the beast and I’m sure when you’re out there fishing life will be a lot easier and the fruits of your labour will enable you to reap great results, with more fish coming to the sides of the boat as you hit the same spot time after time.
As I said there are four articles on this site on chart plotters and how to use them. I can promise you that what I will show you will be simple and effective. Where you go from there will be your choice. The way I do things is not law but is the way I have found to be easy, workable and it certainly puts results on the deck. The four areas I’ll cover will be these:
1 – Buying a chart plotter with enough features to enable effective fishing.
2 – Using a chart plotter to effectively plot bottom features.
3 – Using a chart plotter to drift fish.
4 – Using a chart plotter to fish at anchor.
Plotters 1: Buying a chart plotter with enough features to enable effective fishing
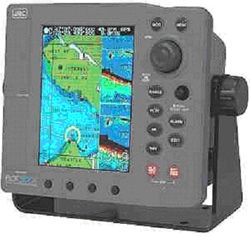
At Christmas I was given a new colour chart plotter/fish finder combined unit to have a play with by SMG {Sutton Marine Group}of Plymouth UK.
The unit was their new JRC PLOT 500F. It combines a colour chart plotter with a dual frequency fish finder, so that every thing you ever need to catch fish is all rolled into one unit.
The idea was that I should have a play around with the unit and then return it, giving them some feedback on how well it performed.
The result was I was so impressed with it compared to the plotter I was already using, that I avoided SMG for as long as I could. When they eventually came to remove it, I was so lost without it that had to go out and by one, straight away!
When buying a chart plotter for yourself, there are several features that are a must, and a whole bunch of other features that can make life easier.
But the most important thing to get right is the simplicity of the unit. How easy is it to use, that is the question?
With thousands of different items available on the market, it is quite possible to waste money on something so complicated and unusable that it will become nothing more than a fancy thing to look at and one hell of an expensive clock.
My personal view is that somewhere just upwards of £1000 gets you the bee’s knees, a unit that will do all you ever need and more.
The more expensive units don’t give you any more usable features, just more complicated menu systems that only Jo 90 could use and will only leave the user with a headache like a hang over.
Features to look for when buying a plotter
1 Charts
Pick one that uses reputable charts like C Map, although these come with a warning that they are never to be used solely on their own for navigation. They are extremely accurate and will only make life easier.
2 Fish finder
If your finances allow, pick one that is a dual unit with a fish finder built in, but remember you will need a dual frequency fish finder with both 50 KHz and 200 KHz beams. The 50 KHz gives you a wide beam so you can search and locate over a wide area, and then you can switch to the 200 KHz which is a narrow beam and is used to pinpoint under water items to within a few feet.
3 Colour or black and white?
It’s your choice but what I will say is that colour units aren’t that much more expensive. They are more pleasing to look at, and the most important thing is that with colour screen definition between things on the chart and fish on the sounder is a lot easier. Most fish will show up as different colours and the density of the bottom will be reflected in the same way, with red usually indicating the hardest of sea bottoms.
4 Vessel and heading vector
Pick one that displays your vessel as a simple shape on the screen so that at a quick glance you can see exactly where your boat is in relation to the surroundings. A heading vector is also useful. For those of you that don’t know, this is a line that runs from the vessel in the direction you are heading. Basically point the line where you want to go, and when it intersects the target, hey presto you’re on course. It is also useful on the drift so you can see well in advance whether you will hit or miss the target.
5 Screen zoom
Pick a plotter that will at least let you zoom from your longest steaming distance, say 100 miles top to bottom into about ¼ of a mile or less, so that when you’re fishing you can pinpoint exactly where you are.
6 North up, course up, head up
Pick a unit that will let you alter the screen set up for north up, course up, and head up displays. I use mine on north up. This method takes a little more time to get used to but is far more effective. North is the top of the screen, east is the right of the screen, south the bottom, and west on the left side. This makes life easy because in Plymouth the tide runs west to east on the flood, and east to west on the ebb, so that means when I have flood tide all my drifts start on the left of the screen and when the ebb runs all the drifts start on the right side. Simple isn’t it!
7 Personalisation
The unit will need to have some facility to add your own marks to the screen for places you wish to fish. About 500–1000 marks will do fine. You might think this sounds excessive but when you get up and running you will soon find your self getting low if you have less than 500. A unit which lets you change the mark icon size, shape and colour can be handy to differentiate between certain under water objects, but is not essential.
8 Latitude and longitude
Nearly all plotters display the boat’s position in latitude and longitude, the boat’s speed in knots, and the course in compass degrees, but do check as these are important and shouldn’t be forgotten.
9 MOB
And last but not least the plotter should have a big red button with MOB written on it. This has no use for fishing but as MOB stands for man over board it might be handy for something, like remembering where you lost your pal, when he decided to put the bucket, with the lanyard attached to it over the side to get water whilst you were doing 30 knots!
Jim O’Donnell, skipperjim@blueyonder.co.uk
![]()