Dave Lane reveals how you find features that produce carp.
THIS article is about feature finding, and how I locate the hotspots I catch fish from. This is easier said than done, as feature finding is a vast subject to cover.
I’ll start by looking at the gear you’ll need and what you should be looking for when using it. I’ll then go on to reveal how you find clear spots in weed – and question whether you should be trying to find hard spots or soft, silty areas in which to place your hook baits.
Hopefully, by the end of this article you’ll have learned that the skill of feature finding isn’t as easy to master as it may appear. Also, it’s not always best to cast your hook baits to hard areas of the lake bed – as you might think from reading other articles by other anglers on the same subject.
Kit You’ll Need
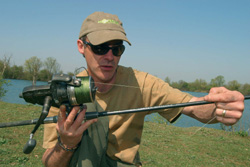 |
| You’ll only be able to feature-find effectively if you have the right tackle |
After a 3lb test curve rod with a sensitive tip (nothing lighter) the most important part of feature finding kit is braided main line. I always use braid for feature finding as it transmits a far more accurate ‘feel’ through to the rod. With monofilament lines there’s a certain amount of stretch that can cause the marker to skip over features without registering them at all.
If you think of mono as a piece of elastic, you can imagine how it performs as you pull it clear of weed or silt. It just pings the marker float and lead back towards you. Braided lines have no stretch. This allows a lead to be slowly dragged across the bottom, revealing any slight difference in the topography of the lake bed.
It’s always worth bearing in mind that most braided main lines have a lot of buoyancy, too. There’s nothing worse than marking a tiny little spot and then tangling up with your marker line when you try to place your rig next to the float!
ESP make a marker braid called Sonar which has a very high gravity. It gets down on the bottom where you want it, out of the way.
Lead choice is also very important and I prefer to use flat or ‘grip’ leads. This sort of lead will drag along the bottom far better and have fewer tendencies to rise off the lake bed. Korda makes a lead called a Big Gripper that’s perfect for feature finding. The little bobbles on the surface make them ping off gravel with an exaggerated motion.
Feature Finding Tips
The Kit You’ll Need
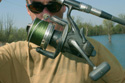 |
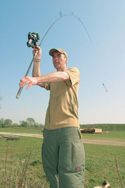
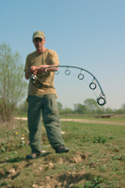
| A big reel will make feature finding easier as it gives more winding power. It could also help you cast further. |
|
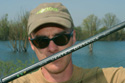 |
| You’ll also need a powerful rod with a sensitive tip for feature finding. Dave recommends 3.25lb test blanks. |
|
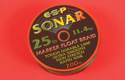 |
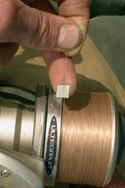
| Most importantly of all, a braided main line is a must. ESP Sonar is one of the best marker braids on the market. |
|
On The Deck
 |
| Pulling the lead carefully back along the bottom can tell you whether you’re fishing over weed, gravel or silt |
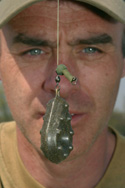
The most important but most overlooked part of feature finding is the need to keep the lead on the bottom at all times.
The use of a marker float will greatly reduce the weight of the lead. Indeed, the float will always be attempting to lift the lead. Obviously I’m not suggesting that a marker float is going to hoist a 4oz lead off the bottom, but as you drag a marker rig over bottom debris, it will lessen the effectiveness of the lead at holding tight to the lake bed. This will therefore lessen your ability to detect features like hard spots on the lake bed – features that could catch you a lot of carp.
Feature Finding In Weed
Because of this, I really can’t see any advantage of searching for clear areas in weed using a marker float permanently attached to the line.
Why? To begin with, markers have the ‘buoyancy’ problems that I have just mentioned. Also, a float will rarely rise up to the surface as it’s usually tangled in weed.
It’s far better to attach a snap link to the end of the line where the float would usually be. This will allow you to pull a lead around in the weed until a clear area is found. Then you simply clip or mark the line, reel in and attach the marker float before recasting and ‘marking’ your spot.
Also, without a float you can strike free of heavy weed and carry on feeling for clear areas, whereas the marker float can become so festooned with weed that you have to continually wind in and clear it all off before trying to find a clear area again.
Using a 4oz or 5oz lead attached to a braided line in this way can really give you a good idea of what the bottom is like, even in the weediest of swims.
I often see people pull through weed with lighter leads, sweeping the rod back over their shoulders before declaring: “Cor, look at that, that’s the spot!”
In reality their lead is probably about six feet off bottom and the lovely ‘clear spot’ they think they have found is actually in mid water above solid weed that their 2oz lead isn’t capable of penetrating.
Tying A Good Marker Float Set-Up
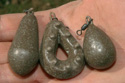 |
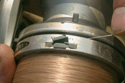
| Lead choice is crucial. Dave reckons the Korda Gripper Leads give a far better feel of the lake bed than other models. |
|
 |
| To tie the marker rig, firstly thread a 4oz Gripper onto your braided main line like this. Nothing difficult so far. |
|
 |
| Now thread on a large rubber bead followed by some silicone tube or a tail rubber (providing a buffer between float and lead). |
|
 |
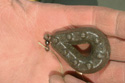
| Next get yourself a link clip like this and tie it on. It will allow you to add and remove your float quickly. |
|
 |
| Cover the link clip in the tubing. The lead will rest against the large rubber bead. Use this set-up to lead around. |
|
 |
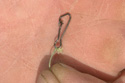
| Finally, when you have found a clear area with the lead, clip on the float and cast back to the same spot to mark it up. |
|
Vertical Line
Feature finding in weed can also be a misleading experience. By this I mean that it’s possible to cast a heavy lead into solid weed and pull back with practically zero resistance. This usually happens as the lead travels vertically through the weed, the line pivoting on the point of entry at the top of the weed bed.
This whole pull, with the lead rising through the weed, can be easily mistaken as a big clear patch because, as you pull the lead back, you won’t feel much resistance.
Always remember that you’ve only found a true clear spot if the lead can be slowly dragged across a smooth-feeling bottom and not leave the lake bed AT ALL. A marker float will make this process extremely hard to perform accurately. Markers are therefore best used for the last-minute marking of a feature you’ve already found.
Work At It
I sometimes cast around for hours to map out the bottom of a weedy swim, often ruining any chance of getting a bite due to all the disturbance.
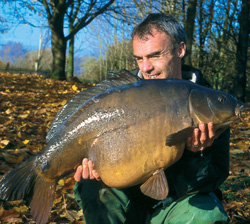 |
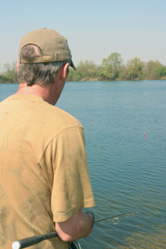
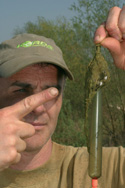
| This fish came from an area of weed at long range that Dave found with the aid of a marker float |
However, the next time I fish it I know what I’m looking for and roughly where a clear spot may be hiding, which gives me a huge advantage.
I will often fish one area and plumb another during one session, thereby still learning about the lake bed, but keeping my own swim relatively undisturbed.
Learning about the swims in advance is priceless. Prior knowledge of clear areas in a weedy lake is such a massive advantage and it can make a tremendous difference to your catch rate.
Although hard areas that transmit a solid ‘donk’ through the rod tip as the lead hits the bottom are a good starting point when looking for feeding spots in weed, it’s worth remembering that they’re not necessarily weed-free just because they are hard.
Some weeds thrive on firm bottoms, but they’re not always the best feeding areas as you would have believe from most of the feature finding articles you read these days.
Sometimes clear, silty areas can be far better. This is because they tend to hold a lot more natural food, like bloodworm and other insect larvae. This can make them more suitable to fishing single hook baits on, as the fish will be feeding there anyway.
Clipping Up And Finding The Depth
 |
| When you want to find the depth, pull the line off your reel in 12-inch lengths until the marker float hits the surface. |
|
 |
| When you are happy you’ve found a spot you want to fish to, mark the main line with some insulating tape. |
|
 |
| When you need to recast to the same spot, clip the line behind the insulating tape, casting in the same direction as before. |
|
Hook Bait Placement
I’ve recently had a couple of very nice fish from a lake in Berkshire by fishing the soft mud at the side of a solid clear hole in the weed.
The spot was the only weed-free area in the swim and both rods were placed within it. One was on the so-called ‘perfect’ hard area, but all four takes I had on separate morning sessions came to the rod placed in the silt at the edge. No coincidence there.
A couple of friends of mine fish the same water and are extremely successful. The one thing they both have in common is their almost fanatical attention to hook bait placement.
I remember one of these guys doubling up with another mate one night, when the lake was extremely busy, and then thrashing his mate’s swim to a foam before finally placing his two single hook baits. That night both his rods produced fish while everybody else’s, including the guy he was doubled up with, caught nothing!
Different Weeds
Knowing what you’re looking for will help you no end, but there are no rules saying what sort of lake bed you should be trying to find.
Weed growth itself can hold vital clues as to which areas are more likely to produce and can tell you where you are in relation to underwater features. Weeds of different types will grow out from differing types of lake bed. Knowing these different types of bottom and the weed types that flourish upon them can help build up a picture of what lies out in front of you.
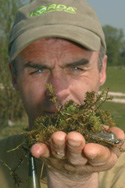
Let me cite you an example of what I mean. Imagine that you’re trying to locate a shallow area and you are pulling back huge clumps of Canadian pond weed on every cast. Then, suddenly, you find a piece of silk weed wound around the lead.
If this happens, your lead will probably have just bounced over a shallow feature. Careful plumbing of that area will locate more silk weed and, eventually, the shallow spot.
Milfoil and other long, heavy stranded weeds usually prefer deep and silty areas. These make for quite poor areas. Where this weed gives way to pond weed, however, you will usually find that the bottom has ‘cleaned up’ considerably and the light penetration is a lot better.
This in turn can lead you to firmer and cleaner areas where the fish are happier to dip down and feed.
 |
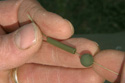
| Silk weed like this loves to live on the top of shallow bars. It holds food and, with careful presentation, you can catch over it. |
|
 |
| Where long, heavy-stranded weeds give way to this more delicate stuff, you will often find a feeding area. |
|
 |
| Canadian pond weed is not the best weed to fish over. Find and fish over spots where it borders lighter weed – like silk weed. |
|
Side Of Bars
As gravel starts to rise from the bottom of a pit, and the compacted firm gravel takes over from silt, so the weed will change again. As I have already mentioned, silk weed loves the shallow tops of bars, but it’s the weed you get on the sides of bars that interests me the most.
There is a long stringy weed, a type of potamageton I believe, that appears mainly in late spring and is usually a nice fresh green colour. It is quite fragile and tends to grow in tight beds on the slopes of bars. Even when the surrounding weed makes actual ‘depth plumbing’, impossible you can use this weed as the perfect marker.
By fishing up against the stringy weed or where the silk weed is, rather than the Canadian or milfoil, you can pretty much guarantee that you’re on the sandiest part of the bar itself. I have so much confidence in areas that boast this weed growth that I almost know it will produce.
Time and time again on many different pits I have found this weed throughout May and June. It’s always indicated a ‘prime’ area and seems to appear sporadically in small beds here and there. These are, without a doubt, the better areas.
Maybe this sort of weed promotes a better food crop of insect life. It could be nutritious in itself. Maybe it has good oxygenating qualities and the fish feel comfortable among its strands. I don’t profess to know the reasoning, but I don’t need to. It is enough to know that it denotes a feeding area.
Remembering and recognising different weeds and bottom aggregates such as sand, clay or gravel can make a vast difference to your catch rate and the cycle will repeat itself year after year and often from lake to lake. So once you’ve learned what to look for, you can go on catching from such areas year after year.
No-Go Areas
So you can see that it’s not just depths and clear areas that I look for when feature finding. As well as productive areas there are, on the other side of the coin, areas that I try to avoid – no-go areas.
Thick black silt that smells disgusting and masks your bait with a putrid odour is the most obvious no-go area, but other more subtle areas will offer little to the fish.
On Wraysbury, for example, I found a lovely gravel hump but failed miserably to get a pick-up from it. Days later when investigating it from a boat using a diving mask, I found that all the bait was still intact and the feature was almost ‘fused’ together out of small stones and rocks.
Apparently it is called ‘ironstone’ and is left behind by the gravel companies.
At first glance it rises out from the weed like a regular bar, but in reality is more reminiscent of a huge piece of precast concrete.
I think the fish find its surface very unyielding, as it boasts no natural food whatsoever. So you can see that recognition of good and bad areas is an important part of the whole angling process. What you think you feel is not always what you get
Helping Hand
I hope I’ve given you a helping hand with your feature finding. I think the one thing that should become apparent to you is that there are no hard and fast rules. On some lakes it can be an advantage to fish in silt, on others it can be an advantage fishing in various types of weed or gravel.
At the very least I hope that I’ve made you think a bit about how you find areas to cast hook baits on top of.