Fitting your bung and elastic

Obviously you are going to have to fit the correct elastic for the style of fishing you intend to do – refer to the panel below to give you a general guide.
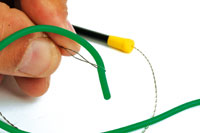
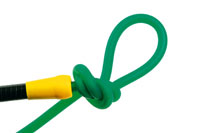
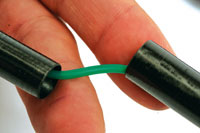
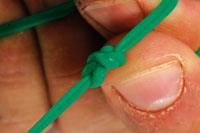
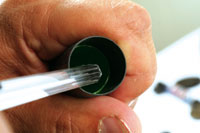
In this piece we are fitting the green Preston Innovations Hollo elastic – which involves using about a No12 and would be well suited to small to medium-sized carp.
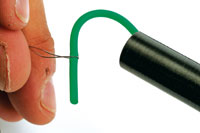
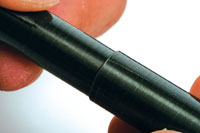
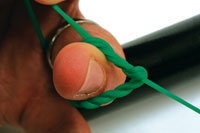
If you are fitting any of the hollow elastics you should usually try to fit it through two sections with the bung going into the bottom of the number three section of the pole. The same goes for the higher grades of solid elastics.
However, in the lighter grades, say from a No5 down, when smaller fish are your target you should be fitting the bung only in the base of the No2 section.
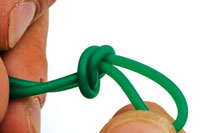
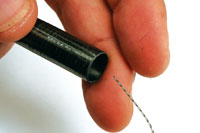
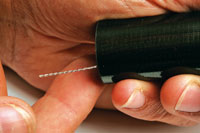
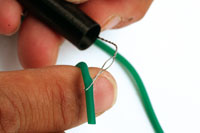
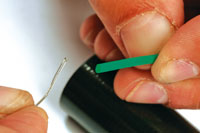
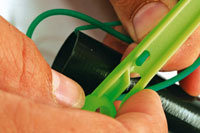
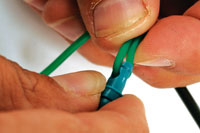
Note that if you are fitting through two sections, using one of the longer diamond eye threaders will make things much easier.

Pole Elastic Ratings
Grade
1-4 Perfect for catching small silver fish with very light hooklengths up to 0.08mm
5-8 Ideal when there are better fish about, like skimmers, with hooklengths from 0.09mm to 0.10mm
8-10 Use when targeting fish such as bream, perch and tench with hooklengths from 0.11mm to 0.12mm
12+ Use for carp when fishing lines bigger than 0.12mm
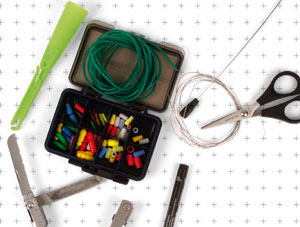
tcf Tool Box
To fit your pole elastic you’ll need:
• A sharp tool for cutting the carbon
• Sandpaper or a file
• A PTFE bush
• Your chosen elastic
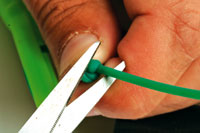
• Scissors
• A bung and bung remover
• A diamond eye threader
• A pen
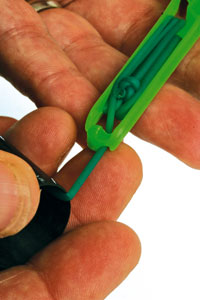
• A Stonfo connector

Step 1
Before you fit the elastic tie a loop on one end to stop it pulling through accidentally.
Step 2
The end of the threader without the diamond eye goes into the top of the pole.
Step 3
We’re elasticating a power top two and need to do so one section at a time.
Step 4
With the threader through the first section push the loose end of the elastic into the diamond eye to lock it in place. 
Step 5
Pull the threader through the section bringing the elastic through with it.
Step 6
The knot at the top will stop you from pulling it through too far.
Step 7
Thread the elastic through the No3 section, again thin end first.
Step 8
Again push the threader through until it comes out of the bottom of the No3 section.
Step 9
Lock the bottom of the elastic into the diamond eye threader again.
Step 10
Pull the elastic through; the sections will pull together.
Step 11
Push the lower (male) section into the upper (female) section.
Step 12
With the bung to hand you can remove the elastic from the threader, but hold on tightly or it will pull back into the section.
Step 13
Pull out several inches of elastic and thread the end through the hole in the bung.
Step 14
Double up the elastic above the bung. We’re using the excellent Preston Hollo bung.
Step 15
Pull tight to loop the doubled up elastic around your fingers.
Step 16
Push the bung through the hole you’ve just created.
Step 17
We prefer to do this twice so you have a double overhand loop knot.
Step 18
Trim off the loose elastic with sharp scissors.
Step 19
You can now let the elastic pull the bung into the bottom of the section.
Step 20
If it doesn’t go in very far give it a bit of a push!

Step 21
Now you can fit your preferred style of connector at the tip.

Step 22
… but remember to add a few turns onto your bung winder (if you have one) before you do.